When it comes to mobile apps, real-time is one of the most useful features to make your application more efficient for the end user.
Luckily for us, Kuzzle Mobile provides an open source backend stack to help you develop real-time applications in no time. But also storing data and managing users and permissions.
This guide is the first part of a series of 3 articles that will help you understand how to develop a real-time messaging mobile application with Kuzzle Mobile and React Native (Largely inspired by the getting-started written by Esteban.B in the Kuzzle documentation).
- Part 1: Initialize the app and manage users login
- Part 2: Let’s code a real-time chat
- Part 3: Better Kuzzle Mobile good practices
We will try to be very exhaustive and deep dive on the best practices we learned with all the Kuzzle team through many projects.
Ready? let's go!
Prerequisites
In this tutorial we're going to use React Native in conjunction with Expo. For those who are not familiar with Expo, it is an open-source platform helping build native applications for Android and iOS using React-Native.
Also, to run an instance of Kuzzle Mobile, we will need Docker and Docker-compose.Note that it is strongly recommended to use Linux or Mac OS as operating systems.
If you don’t already have all these tools, you can check these tutorials
If you want to run and test the application on a real device (what I recommend), you will need to install the Expo application on your phone.
Download Expo client for Android from the Play Store
Download Expo client for iOS from the App Store
Concerning Kuzzle Mobile, I recommend that you run it once following this getting-started on our documentation website before. It will make you use the installation script and check that everything is OK before you can follow this guide.
Initialize the project
Once you set up all those tools, it’s now the time to create a new mobile application project !
Expo and React Native
Launch a terminal, go where you want to create the project on your file system and simply type:
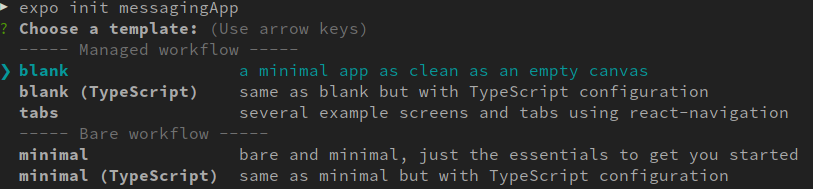
expo init messagingApp
(of course, you can choose another name)
The CLI is going to ask you which template to use, just take the first option and press enter.
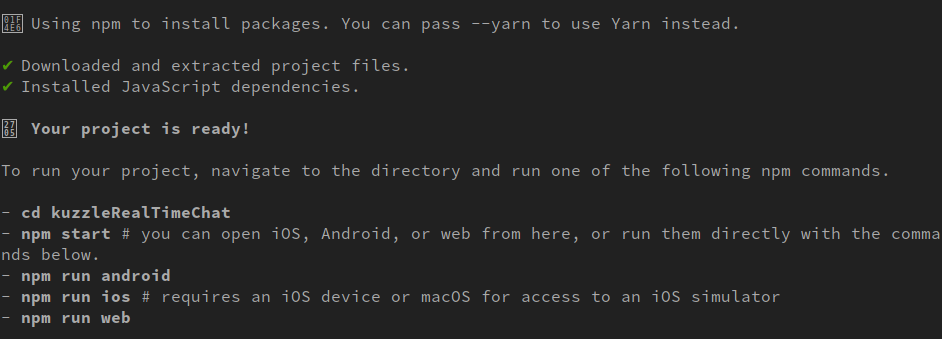
Once everything is downloaded and installed, just follow the Expo instructions and go to your new project folder.
Now, we need to install some dependencies to help us to develop our application. Here's the list:
- kuzzle-sdk: the official Kuzzle javascript SDK! It provides a way to dial with a Kuzzle server from Javascript applications using protocols.
- native-base: essential cross-platform UI components for React Native
- expo-secure-store: who provides a way to encrypt and securely store key–value pairs locally on the device
To install all of them, type this command in your terminal and wait for everything to be set up:
npm i kuzzle-sdk native-base expo-secure-store
It’s time to run your favorite code editor (we're not going to debate here which one is better 😉 ).
And if you open App.js you will see some code examples. This is the entrypoint of our application.
Check if everything is working correctly by executing this command :
npm start
This will open a new browser window with all the logs of the application and other options. And also in your terminal you will see a QRcode, scan it with the Expo app on your device to run our freshly created application !
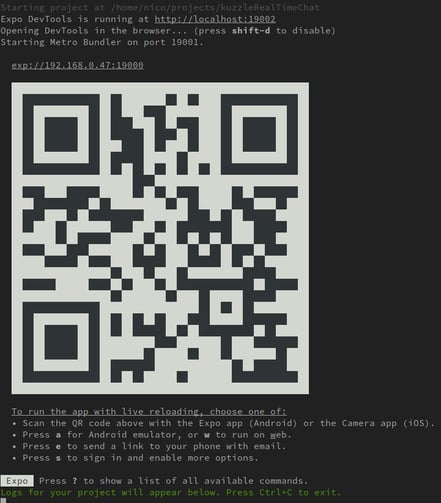
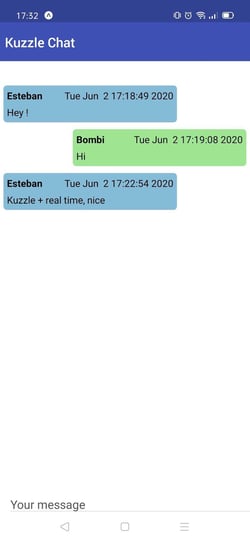
And tadaa! In front of your eyes, here is our application! Yeah, okay, it’s not doing much right now, but be patient.

Docker-compose
The next step to finish to initialize our project is to launch an instance of Kuzzle Mobile.
To doing that we just need to create a docker-compose.yml file at the root of the project and add these lines :
version: "3"

services:
  kuzzle:
    image: kuzzleio/kuzzle:2
    ports:
      - "7512:7512"
      - "1883:1883"
    cap_add:
      - SYS_PTRACE
    depends_on:
      - redis
      - elasticsearch
    environment:
      - kuzzle_services__storageEngine__client__node=http://elasticsearch:9200
      - kuzzle_services__internalCache__node__host=redis
      - kuzzle_services__memoryStorage__node__host=redis
      - kuzzle_server__protocols__mqtt__enabled=true
      - NODE_ENV=production

  redis:
    image: redis:5

  elasticsearch:
    image: kuzzleio/elasticsearch:7.4.0
    ulimits:
      nofile: 65536

volumes:
  es-data:
    driver: local
Note that Kuzzle is based on top of Elasticsearch for data storage and Redis for internal cache management. This is why we declare 3 services in our docker-compose file. We also add a docker volume to persist all our data even if we kill or remove our containers.
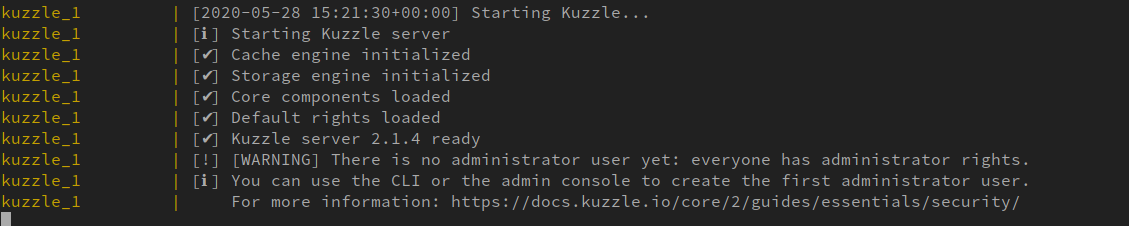
Check that your instance launches correctly by running:
docker-compose up
You should see that Kuzzle Mobile is ready after the launch sequence.
Configuring Kuzzle Mobile
Now that our instance is started and the project is initialized, we can move on to configuration.
Kuzzle Admin Console
We provide an administration console, hosted by us. But don’t worry, it’s only an static application running on your browser, no data is kept, and this console only connects to your Kuzzle instance through your own network.
To access to it just follow this link : http://console.kuzzle.io/kuzzle-v2/
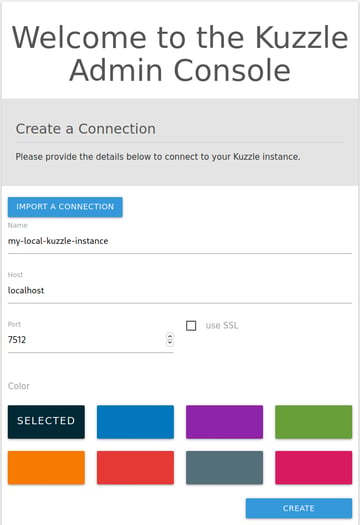
If this is the first time you come here, you will be asked to create a new environment to connect to your running Kuzzle Mobile server.
Just fill the form by giving a name to your environment. On the “host” input, give the url or the hostname to reach your instance (localhost in our case). Also keep the default port and uncheck the “use SSL” option.
Submit this form by clicking on the “Create” button.
Follow the instructions on your screen to create an administrator account and don’t forget to check “Remove anonymous credentials”
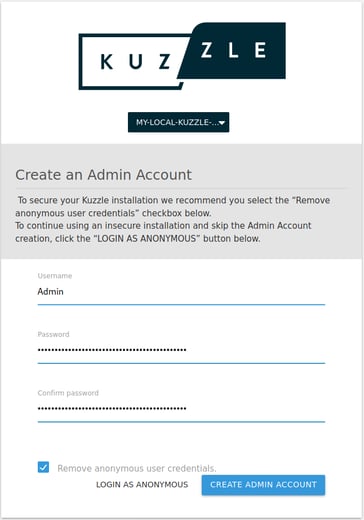
After logging in with your new administrator account, you can see the main interface of the Admin Console.
Managing your data
Now it’s time to put down the keyboard and read a little explanation about how we organize our data with Kuzzle!
As I mentioned above, we use Elasticsearch as a document-oriented storage. All documents, including internal Kuzzle ones (such as security information), are stored in Elasticsearch indexes.
data storage is organized in 4 levels :
- indexes
- collections
- documents
- fields
An index brings together several collections, which in turn contain several documents, each of which is composed of several fields.

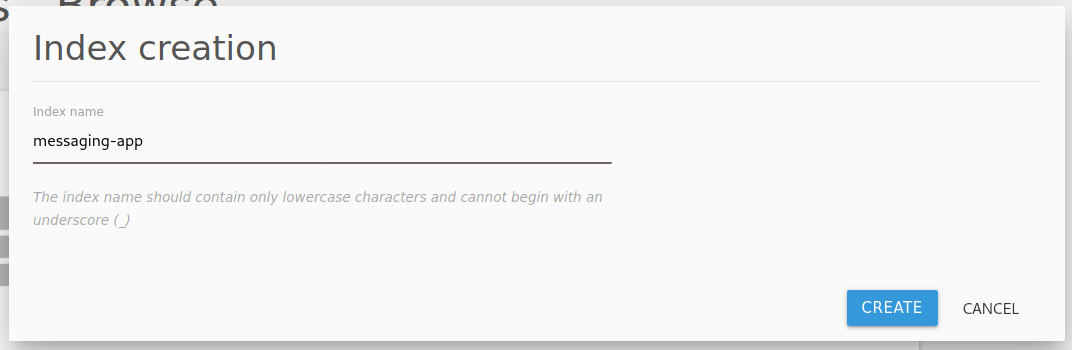
If this principle is applied to our messaging application, We need exactly one index for the entire application containing only one collection, this one will store all the messages sent by the users as documents.
So, go back on the Admin Console and click on the “Create an index” button and give it a name (something like “messaging-app”).
When it’s done you can now create a new collection. Click on the “Create a collection” button.
And… let me introduce to you the notion of "mappings".
Like it’s said on the Admin Console :
“Mapping is the process of defining how a document, and the fields it contains, are stored and indexed.”
To know more about ES mapping and all supported types go here.
The mapping we need to store users' messages is really simple, we only need the content of the message and its author.
Something like this will do the job :
{
  "content": { "type": "text" },
  "author": { "type": "keyword" }
}
Note that the difference between “text” and “keyword” types are mainly about how Elasticsearch is indexing the contents of the document.
For keyword type, we can perform sorting operations and exact match of content of the field, and if we want to fuzzy match inside a long text, we need to specify a text type.
Create the new collection with this mapping and give it a name, “messages” seems a good name. Validate the form and we’re done for data management for the moment.
Right and permissions
For the next step we'll be able to focus on our users. This is the part where we are going to configure rights and permissions.
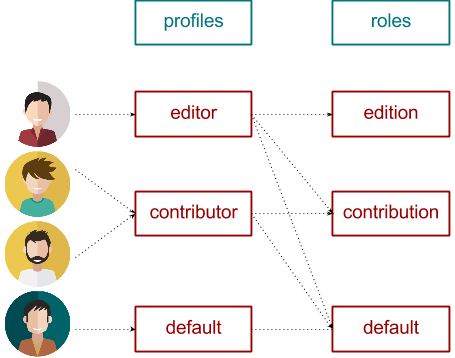
Kuzzle's security layer links users to one or more profiles. You can think of a profile as a group of users that share the same permissions.
The profiles themselves are made up of different groups of permissions, these groups are called roles.
A profile is linked to a set of roles, and each role defines a set of permissions. For example, in the diagram below, the editor profile has all permissions, the contributor has a subset of the permissions, and the default profile has only default permissions:
Go to the “Security” menu on the Admin Console then click on the “Roles” link in the left menu.
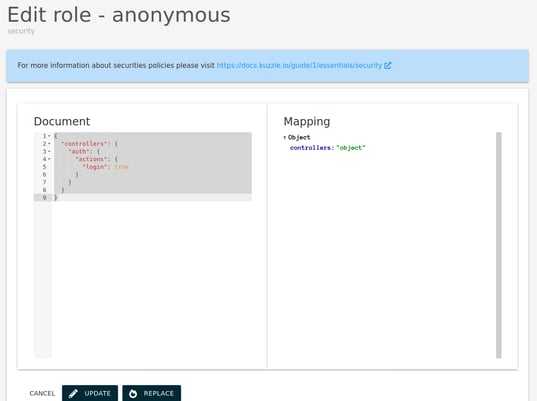
First we will restrict the “anonymous” role so that it can perform only the minimum amount of action to authenticate itself.
Edit this role by clicking on the pencil and give it this rule :
{
  "controllers": {
    "auth": {
      "actions": {
        "login": true,
        "checkToken": true
      }
    }
  }
}
Note that security permissions behave like a white list, so anything that's not allowed is forbidden.
Validate by clicking on the “Update” button.
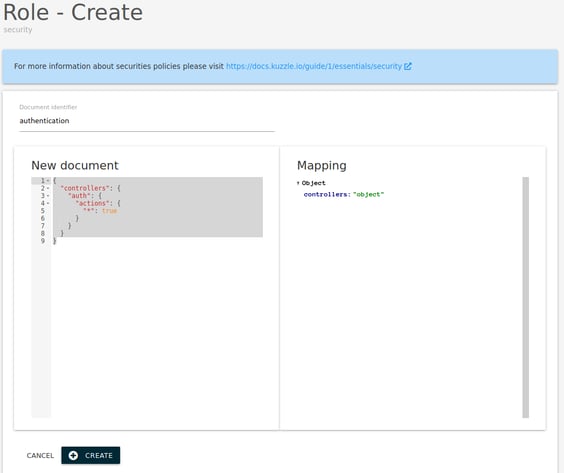
Next, we need to create a new role, this one will give it tall the authentication permissions to our logged-in users. Click on the “Create” Button and give it the name “authentication” and this permission :
{
  "controllers": {
    "auth": {
      "actions": {
        "*": true
      }
    }
  }
}
Once again, validate the form. And now we can go to the “profiles” page by clicking on the left menu.
Create a new profile, call it “standard-user” and give to it this content :
{
  "rateLimit": 0,
  "policies": [
    {
      "roleId": "authentication"
    }
  ]
}
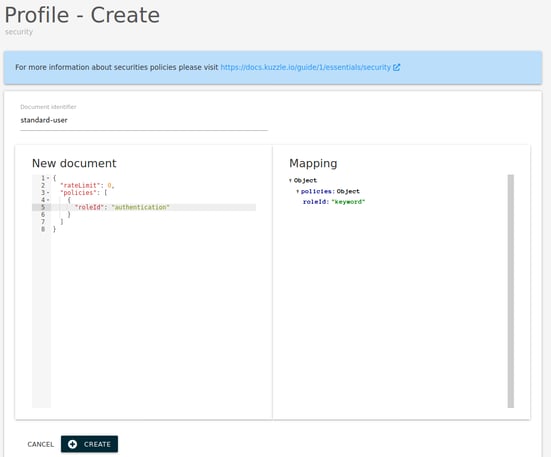
Submit the form by clicking on the “Create” button and now our new profile benefits from the permissions defined in the role "authentication".
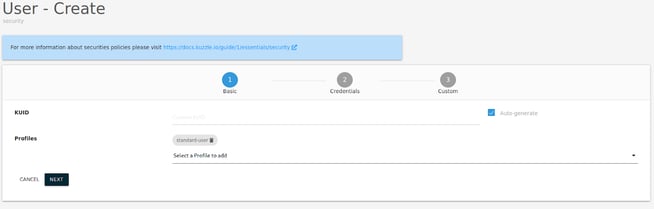
And for the next step, we just need to create a new user. Click on the “Users” link on the left bar then on the “Create” button and fill the first part of the form by checking the “Auto-generate” checkbox for the KUID. This will let kuzzle generate an unique user ID. Also add the “standard-user” profile then click on the “Next” button
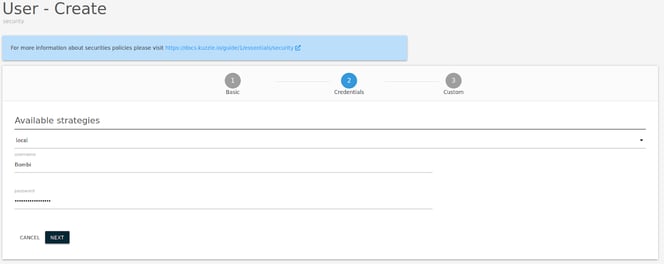
For the next parts of the form, we will define the credentials of our new user. Choose a username and a password (remember it, we will need it to test the application) and click on the “Next” button.
To finish the creation of the new user, just click on the “Save” button.
You will be redirected to the list of users and you can now see the new user you just created.
We’re done for configuration for now. It's a good time to move on to the next part!
Let’s code !
Take a coffee and a deep breath, it’s time to code!
We will connect our application to the Kuzzle instance and create our own login form.
The main components
Again take your favorite code editor and we can now move on to the main component of our application. Open App.js and remove all the code present in it, we don’t need it anymore.
The first thing to do is to define the imports statement on top of our file and initialize an empty main function:
import React, { useState, useEffect } from "react";

import * as Font from "expo-font";

import { AppLoading } from "expo";

import {
  Root,
  Header,
  Body,
  Title,
  Container,
  Toast,
  Text,
  Spinner,
} from "native-base";

export default function App() {}
Once that's done, we'll be able to start initializing our application. The Native-base components need to load fonts before anything. Luckily for us, Expo provides a simple way to do this which we will couple to a variable of our state and a React State Hook.
To do that, in top of the App function, define a state variable with the useState method:
const [isRessourcesLoaded, setIsRessourcesLoaded] = useState(false);
(To know more about State Hook go here)
We also need some new function to load our fonts :
const showToast = (type, message) => {
  return Toast.show({
    text: message,
    duration: 8000,
    type: type,
  });
};

const loadRessources = async () => {
  await Promise.all([
    Font.loadAsync({
      Roboto: require("native-base/Fonts/Roboto.ttf"),
      Roboto_medium: require("native-base/Fonts/Roboto_medium.ttf"),
    }),
  ]);
};

const onLoadingError = () => {
  showToast(
    "danger",
    "Sorry an error occurred while the application is loading"
  );
};
The first one is just to show an error toast to our user, indeed, it's a good practice to display a custom error message that a user can understand if something goes wrong.
The second function is here to load all the fonts needed to run the application correctly.
And the third one, is handled if there is an error when loading the fonts and shows an error toast to the user.
Now, we can add the render function and the return statement :
const renderApp = () => {
  if (!isRessourcesLoaded) {
    return (
      <AppLoading
        startAsync={loadRessources}
        onError={onLoadingError}
        onFinish={() => setIsRessourcesLoaded(true)}
      />
    );
  }

  return (
    <Root>
      <Container>
        <Header>
          <Body>
            <Title>Kuzzle Chat</Title>
          </Body>
        </Header>

        <Container padder>
          <Text>Hello World !</Text>
        </Container>
      </Container>
    </Root>
  );
};

return renderApp();
Let’s run our application with Expo by running :
npm start
And scan the QRcode with the Expo app on your phone to see the result

Connect to Kuzzle Mobile
To connect our application to our running Kuzzle Mobile instance, we will use the kuzzle-sdk previously installed. We will create a service to instantiate the SDK and easily import it where it’s needed.
At the root of the project, create a new folder called services and add in this one a new file called kuzzle.js. You can now add these lines :
import { Kuzzle, WebSocket } from "kuzzle-sdk";

export default new Kuzzle(new WebSocket("192.168.0.47"), {}); //put your local Kuzzle IP here
What we are doing here is simply instantiating the SDK with the WebSocket protocol in order to be able to use the real-time features down the road.
Don't forget to replace the IP address with the one of your own machine (this is necessary to test the application from your own device).
Go back to the App.js file and add the import of the new service we just created :
import kuzzle from "./services/kuzzle";
We can now add a 2 new values in our state again with the useState method to manage connection to our Kuzzle server and set everything is loading well to the application
const [connected, setConnected] = useState(false);
const [isLoadingComplete, setisLoadingComplete] = useState(false);
Now we need a new fonction to connect to our Kuzzle instance :
const connectToKuzzle = async () => {
  try {
    await kuzzle.connect();
  } catch (err) {
    setConnected(false);

    showToast(
      "danger",
      "It looks like you're not connected to Kuzzle Mobile. Trying to reconnect..."
    );
  }
};
Another thing to know is the Kuzzle SDK can throw some events in case it was disconnected and also by default, it can perform auto reconnection if the network is lost and found again. Which is a very good thing for mobile applications.
So let’s create a new function to handle all these events :
const handleKuzzleEvents = () => {
  kuzzle.on("connected", () => {
    setConnected(true);
  });

  kuzzle.on("reconnected", () => {
    setConnected(true);
  });

  kuzzle.on("disconnected", () => {
    setConnected(false);

    showToast(
      "danger",
      "It looks like you're not connected to Kuzzle Mobile. Trying to reconnect..."
    );
  });
};
It’s time to add some hooks with the useEffects methods, those will be called once the value of some variable, given in parameter, will be updated
useEffect(() => {
  if (isRessourcesLoaded) {
    handleKuzzleEvents();
    connectToKuzzle();
  }
}, [isRessourcesLoaded]);

useEffect(() => {
  if (connected) {
    setisLoadingComplete(true);
  }
}, [connected]);
To sum up, the application will first load what is needed for the display (i.e. the fonts) then once finished it will connect to Kuzzle and finally toggle the complete loading state.
Don’t forget to update the render function like this :
const renderApp = () => {
  if (!isRessourcesLoaded) {
    return (
      <AppLoading
        startAsync={loadRessources}
        onError={onLoadingError}
        onFinish={() => setIsRessourcesLoaded(true)}
      />
    );
  }

  let pageContent = null;

  if (!isLoadingComplete && isRessourcesLoaded) {
    pageContent = <Spinner />;
  } else {
    pageContent = <Text>Hello World !</Text>;
  }

  return (
    <Root>
      <Container>
        <Header>
          <Body>
            <Title>Kuzzle Chat</Title>
          </Body>
        </Header>

        <Container padder>{pageContent}</Container>
      </Container>
    </Root>
  );
};
We condition the content of the page according to the state of the application and show a spinner instead of the content if we are not connected to a Kuzzle instance.
Let’s try on your device with Expo to check there is no error when the project is builded.
If there are no errors, we can then go on to the next step !
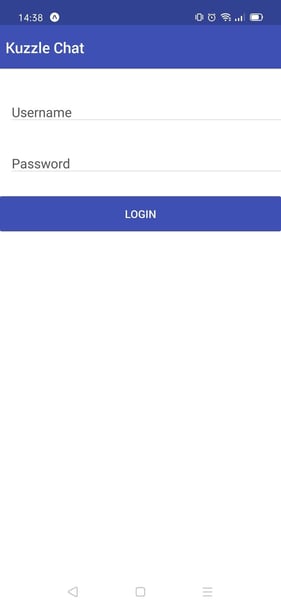
Login form
Right now create another folder at the root of the project and call it “components”. And of course, in this folder, create a new file called LoginForm.js
And this is what this component is going to look like:
import React, { useState, useEffect } from "react";
import {
  Form,
  Item,
  Input,
  Label,
  Button,
  Text,
  Toast,
  Content,
} from "native-base";
import kuzzle from "../services/kuzzle";

export default function LoginForm({ onLoginSuccess }) {
  const [username, setUsername] = useState(null);
  const [isUsernameEmpty, setIsUsernameEmpty] = useState(false);

  const [password, setPassword] = useState(null);
  const [isPasswordEmpty, setIsPasswordEmpty] = useState(false);

  const [canPerformLogin, setCanPerformLogin] = useState(false);

  const validateForm = async () => {
    let isFormValid = true;
    setIsUsernameEmpty(false);
    setIsPasswordEmpty(false);

    if (!username) {
      setIsUsernameEmpty(true);
      isFormValid = false;
    }

    if (!password) {
      setIsPasswordEmpty(true);
      isFormValid = false;
    }

    setCanPerformLogin(isFormValid);
  };

  const performLogin = async () => {
    let jwt = null;
    console.log("perform login");
    try {
      jwt = await kuzzle.auth.login("local", {
        username,
        password,
      });

      onLoginSuccess(jwt, username);
    } catch (err) {
      showToast("danger", err.message);
    }
  };

  const showToast = (type, message) => {
    return Toast.show({
      text: message,
      duration: 5000,
      type: type,
    });
  };

  useEffect(() => {
    if (canPerformLogin) {
      performLogin();
    }
  }, [canPerformLogin]);

  return (
    <Content>
      <Form>
        <Item floatingLabel error={isUsernameEmpty}>
          <Label>Username</Label>
          <Input onChangeText={(username) => setUsername(username)} />
        </Item>
        <Item floatingLabel error={isPasswordEmpty}>
          <Label>Password</Label>
          <Input
            secureTextEntry={true}
            onChangeText={(password) => setPassword(password)}
          />
        </Item>
        <Button
          block
          onPress={validateForm}
          style={{
            marginTop: 32,
          }}
        >
          <Text>Login</Text>
        </Button>
      </Form>
    </Content>
  );
}
This is not a very complicated component. What we have here is :
- In top of the file, all the needed imports
- The component function, note that we add a props parameter, it will be a function from the parent component, called once the login action is performed
- All the variables state and there setters needed
- A function to validate the form and another one to show toast if errors happen,
- A hook with the useEffect method to call the perform login function with the Kuzzle SDK for the local authentication strategy.
- And to finish, the return statement with all the JSX for our form
Finally the last step is to update the main components of the application. Go back to the App.js file and add new state variables :
const [jwt, setJwt] = useState(null);
const [username, setUsername] = useState(null);
const [isLoggedIn, setIsLoggedIn] = useState(false);
Also add a new function to handle login success action from the child component :
const onLoginSuccess = (jwt, username) => {
  setJwt(jwt);
  setUsername(username);
};
As well add another useEffect hook to properly set the corresponding state variable :
useEffect(() => {
  if (jwt && username) {
    setIsLoggedIn(true);
  }
}, [jwt, username]);
And finally, don’t forget to update the render method
const renderApp = () => {
  if (!isRessourcesLoaded) {
    return (
      <AppLoading
        startAsync={loadRessources}
        onError={onLoadingError}
        onFinish={() => setIsRessourcesLoaded(true)}
      />
    );
  }

  let pageContent = null;

  if (!isLoadingComplete && isRessourcesLoaded) {
    pageContent = <Spinner />;
  } else if (!isLoggedIn) {
    pageContent = <LoginForm onLoginSuccess={onLoginSuccess} />;
  } else {
    pageContent = <Text>Hello {username}</Text>;
  }

  return (
    <Root>
      <Container>
        <Header>
          <Body>
            <Title>Kuzzle Chat</Title>
          </Body>
        </Header>
        <Container padder>{pageContent}</Container>
      </Container>
    </Root>
  );
};
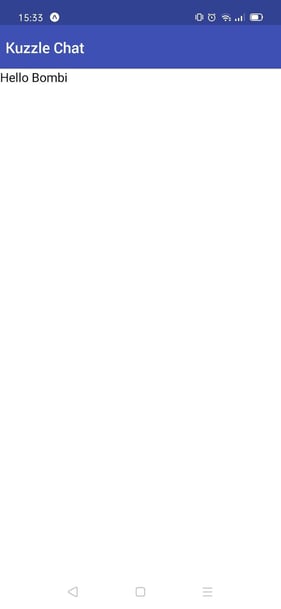
Yet again, try if everything is working by running the project on your device with Expo. Try to login with the user you created before. If everything is working, you will see “Hello” followed by the username of your user.
Conclusion
Here we are, we have finished the first part of this guide about React Native and Kuzzle Mobile.
I know this is not the funniest part, but we've explored a lot of important concepts necessary for the following.
We learned how to launch a Kuzzle instance, configure indexes and collections but also securities for your users. And of course, how to start a project and how to have a login form to authenticate users with Kuzzle Mobile.
In the next part we'll see how to create the real time chat and add it to our application.
If you have any questions or need a little help, Don't hesitate to join our official Kuzzle Community Discord server.
Special thanks to the Kuzzle team for reviewing the code and proofreading this article.
See you next time!

