The mobile video game ecosystem has took a new turn in recent years. Pokemon Go in 2018 or more recently Harry Potter Wizards Unite are location-based applications that allow us to capture and collect a variety of creatures around the world (although they mostly prefer large cities).
Like any good self-respecting developer, at Kuzzle we were keen to tinker with our own version of a GO-like app. Why don't we create (with Kuzzle) the new app to capture and collect programming languages?
Pokemon Go, Wizards Unite... Kuzzle Go soon?
We will build our application using Flutter for the mobile application and Kuzzle to easily set up a robust back-end.
Laying the foundations
The architecture of our project is divided as such: an app/ folder where we will put our Flutter application and a backend/ folder where we will put our Kuzzle server.
You can follow this guide to initialize the Flutter app in the app/ folder.
For the backend, we will use the Kuzzle core plugin boilerplate, we just need to clone the rest in our folder and name it backend/.
Let's get into it.
View Google map
First step: display the map of where you really are!
First of all, the main widget of our application ("App") contains a "DefaultTabController", it is a widget imported from the Flutter Material Design library. There is only one tab so far which is our map:
class _AppState extends State<App> {

 @override
 Widget build(BuildContext context) {

   return MaterialApp(
     title: 'Kuzzle GO',
     theme: ThemeData(
       primarySwatch: Colors.blue,
     ),
     home: DefaultTabController(
       length: 1,
       child: Scaffold(
         appBar: AppBar(
           bottom: TabBar(
             tabs: [
               Tab(text: 'Map', icon: Icon(Icons.map)),
             ],
           ),
         ),
         body: TabBarView(
           children: [
             GoMap(),
           ],
         ),
       ),
     ),
   );
 }
}
All that remains is to create our "GoMap" widget which contains the official Flutter Google Map widget (you will need to "create and import your API key" beforehand for the widget to work).
We also use the "geolocator" package to regularly retrieve the geolocation and move the camera on the map accordingly:
class _MapState extends State<Map> with AutomaticKeepAliveClientMixin {
 // tells flutter to not destroy
 // this widget on tabs change
 bool wantKeepAlive = true;

 CameraPosition _initialPosition = CameraPosition(target: LatLng(0, 0), zoom: 18.8);
 GoogleMapController _controller;
  _synchronize() async {
   Position position = await Geolocator().getCurrentPosition(desiredAccuracy: LocationAccuracy.high);

   _controller.animateCamera(
     CameraUpdate.newLatLng(LatLng(position.latitude, position.longitude)),
   );

   sleep(new Duration(seconds: 1));
   this._synchronize();
 }

 _onMapCreated(GoogleMapController controller) async {
   _controller = controller;
   this._synchronize();
 }

 @override
 Widget build(BuildContext context) {
   super.build(context);

   return Scaffold(
     body: Stack(
       children: <Widget>[
         GoogleMap(
           onMapCreated: _onMapCreated,
           initialCameraPosition: _initialPosition,
           myLocationEnabled: true,
           mapType: MapType.terrain,
           rotateGesturesEnabled: false,
           scrollGesturesEnabled: false,
           tiltGesturesEnabled: false,
           zoomGesturesEnabled: false
         ),
       ],
     )
   );
 }
}
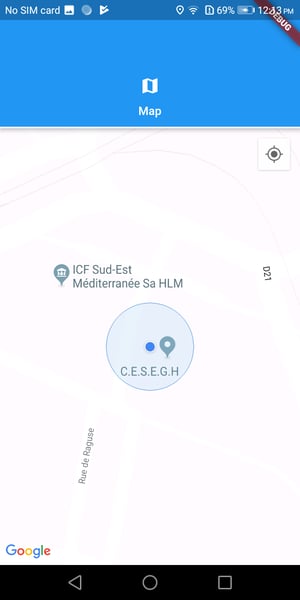
And here's the result! An... empty map.
Setting up collectables
We will now move on to Kuzzle to set up our languages, their apparition in the world, etc.
For this, we will use two collections: "entities" and "collectable".
"entities": this is where we will put the characteristics of the languages that we can find in the game (name, description, image, etc...).
"collectable": it is in this collection that all the instances of a language in the world will be placed. A collectable is an instance of an entity that can be caught in the game.
We will therefore start by creating the mapping of these two collections by editing the server/fixtures/default-mappings.json file:
{
 "world": {
   "entities": {
     "dynamic": "strict",
     "properties": {
       "name": {
         "type": "keyword"
       },
       "description": {
         "type": "text"
       },
       "image": {
         "type": "text"
       }
     }
   },
   "collectable": {
     "dynamic": "strict",
     "properties": {
       "location": {
         "type": "geo_point"
       },
       "entity": {
         "type": "keyword"
       }
     }
   }
 }
}
The "collectable" collection will be filled automatically but we can already edit the server/fixtures/default-fixtures.json file the "entities" collection with the languages we want to see to appear in the game:
{
 "world": {
   "entities": [
     { "index": { "_id": "javascript" }},
     {
       "name": "JavaScript",
       "image": "https://upload.wikimedia.org/wikipedia/commons/thumb/6/6a/JavaScript-logo.png/600px-JavaScript-logo.png",
       "description": "JavaScript, often abbreviated as JS, is a high-level, interpreted programming language that conforms to the ECMAScript specification. JavaScript has curly-bracket syntax, dynamic typing, prototype-based object-orientation, and first-class functions."
     },
     { "index": { "_id": "c" }},
     {
       "name": "C",
       "image": "https://png.icons8.com/color/1600/c-programming",
       "description": "C is a general-purpose, procedural computer programming language supporting structured programming, lexical variable scope, and recursion, while a static type system prevents unintended operations."
     },
     { "index": { "_id": "cpp" }},
     {
       "name": "C++",
       "image": "https://is2.4chan.org/g/1562645051087.png",
       "description": "C++ is a general-purpose programming language created by Bjarne Stroustrup as an extension of the C programming language, or 'C with Classes'. The language has expanded significantly over time, and modern C++ has object-oriented, generic, and functional features in addition to facilities for low-level memory manipulation."
     },
     { "index": { "_id": "haskell" }},
     {
       "name": "Haskell",
       "image": "http://dev.stephendiehl.com/hask/img/haskell_logo.svg",
       "description": "Haskell is a statically typed, purely functional programming language with type inference and lazy evaluation. Type classes, which enable type-safe operator overloading, originated in Haskell."
     },
     { "index": { "_id": "java" }},
     {
       "name": "Java",
       "image": "https://www.stickpng.com/assets/images/58480979cef1014c0b5e4901.png",
       "description": "Java is a general-purpose programming language that is class-based, object-oriented (although not a pure OO language, as it contains primitive types), and designed to have as few implementation dependencies as possible."
     }
   ]
 }
}
You can fill this file with the entities you want (other languages, cars, fruits, famous characters...).
Establishment of entities
To choose or instantiate entities in our world, we will choose the following technique: first, each client of the application will regularly register its geolocation with the backend. Then, we check if there are any collectables in an arbitrary perimeter around the player. If there are none, then an X number of randomly selected entities can be instantiated.
Let's make the code of the action "register" that will be called by the different clients to record their positions:
 async register (request) {
   const lat = this.floatParam(request, 'latitude');
   const lon = this.floatParam(request, 'longitude');

   const results = await this.sdk.document.search(
     'world',
     'collectable',
     {
       query: {
         bool: {
           must: { match_all: {} },
           filter: {
             geo_distance: {
               distance: '100m',
               location: { lat, lon }
             }
           }
         }
       }
     }
   );

   if (results.total) {
     return true;
   }

   const { hits: entities } = await this.sdk.document.search(
     'world',
     'entities',
     { query: {} }
   );

   const P = {
     latitude: lat,
     longitude: lon
   };

   const newCollectable = Array(20)
     .fill(null)
     .map(() => ({
       body: {
         entity: entities[Math.floor(Math.random() * entities.length)]._id,
         location: mapKeys(randomLocation.randomCirclePoint(P, 100), (_, k) => k.substr(0, 3))
       }
     }));

   await this.sdk.document.mCreate(
     'world',
     'collectable',
     newCollectable
   );

   return true;
 }
You must then setup this action in the plugin so that you can call it from the client!
Our work on the back end is already finished! We can now go back to our mobile application (it's fast with Kuzzle :p).
Kuzzle connection & data loading
On the mobile application side, we now need to connect to our backend and then load the data we will need to run our application: the images of each entity (our languages) and the "shared_preferences" in which we will store the entities caught by the player.
First of all, we will need to connect to Kuzzle via the Dart SDK. Once installed and imported, we can connect to the backend in the "main" function of our application:
final kuzzle = Kuzzle(
 WebSocketProtocol('10.35.251.242', port: 7512),
 offlineMode: OfflineMode.auto,
);

void main() {
 kuzzle.on('error', (e) {
   debugPrint(e);
 });

 kuzzle.connect();
 return runApp(App());
}
We then modify our "App" widget which now looks like this:
class _AppState extends State<App> {
 _AppState();

 Map<String, dynamic> _entities;
 SharedPreferences _prefs;
 bool _isLoading = true;

 loadData() async {
   final Map<String, dynamic> entities = Map();

   final results = await kuzzle.document.search(
     'world',
     'entities',
     size: 100,
   );

   for (var entity in results.hits) {
     entities[entity['_id']] = entity['_source'];
     entities[entity['_id']]['asset'] = await loadNetworkImage(entity['_source']['image'], width: 100);
   }

   SharedPreferences prefs = await SharedPreferences.getInstance();

   setState(() {
     _prefs = prefs;
     _entities = entities;
     _isLoading = false;
   });
 }

 @override
 void initState() {
   super.initState();
   loadData();
 }

 @override
 Widget build(BuildContext context) {
   if (_isLoading) {
     return Container(
       child: Center(
         child: Column(
           crossAxisAlignment: CrossAxisAlignment.center,
           children: <Widget>[
             SizedBox(
               child: CircularProgressIndicator(),
               height: 200.0,
               width: 200.0,
             ),
           ],
         ),
       ),
     );
   }

   return MaterialApp(
     title: 'Kuzzle GO',
     theme: ThemeData(
       primarySwatch: Colors.blue,
     ),
     home: DefaultTabController(
       length: 1,
       child: Scaffold(
         appBar: AppBar(
           bottom: TabBar(
             tabs: [
               Tab(text: 'Map', icon: Icon(Icons.map))
             ],
           ),
         ),
         body: TabBarView(
           children: [
             GoMap(entities: _entities, prefs: _prefs)
           ],
         ),
       ),
     ),
   );
 }
}
We can see in this code the use of the "loadNetworkImage" function which is a helper function to download an image and crop it into a specific size:
Future<dynamic> loadNetworkImage(String url, { int width: -1, int height: -1 }) async {
 final NetworkImage image = NetworkImage(url);
 final NetworkImage val = await image.obtainKey(ImageConfiguration());
 final ImageStreamCompleter load = image.load(val);
 final completer = Completer();

 load.addListener(ImageStreamListener((ImageInfo info, bool syncCall) async {
   final res = await getBytesFromCanvas(info.image, width: width, height: height);
   completer.complete(BitmapDescriptor.fromBytes(res));
 }));

 return completer.future;
}

Future<Uint8List> getBytesFromCanvas(dynamic inputImg, { int width: -1, int height: -1 }) async {
 final PictureRecorder pictureRecorder = PictureRecorder();
 final Canvas canvas = Canvas(pictureRecorder);
  if (width == -1 && height == -1) {
   width = inputImg.width;
   height = inputImg.height;
 } else if (width == -1) {
   double ratio = inputImg.width / inputImg.height;
   width = (height * ratio).toInt();
 } else {
   double ratio = inputImg.height / inputImg.width;
   height = (width * ratio).toInt();
 }

 final Rect inRect = Offset.zero & Size(inputImg.width.toDouble(), inputImg.height.toDouble());
 final Rect outRect = Offset.zero & Size(width.toDouble(), height.toDouble());
  canvas.drawImageRect(inputImg, inRect, outRect, Paint());
  final img = await pictureRecorder.endRecording().toImage(width, height);
 final data = await img.toByteData(format: ImageByteFormat.png);
 return data.buffer.asUint8List();
}
Now that we have our data loaded and transmitted to our "GoMap" widget, we can start detecting and capturing languages!
Detection and display of entities
We will add some methods to our "GoMap" widget in order to be able to hunt languages correctly.
First, we need a method that will allow us to use the action "register" (which we did earlier in our backend) by sending the position passed as an argument:
_registerPositionToServer(Position position) async {
   await kuzzle.query(KuzzleRequest(
     controller: 'kuzzle-plugin-advanced-boilerplate/location',
     action: 'register',
     body: {
       'latitude': position.latitude,
       'longitude': position.longitude
     }
   ));
 }
Then we need a method that will look for all entities within a 50-meter radius of our position:
_searchEntities(Position position) async {
   return await kuzzle.document.search(
     'world',
     'collectable',
     size: 100,
     query: {
       'query': {
         'bool': {
           'must': { 'match_all' : {} },
           'filter': {
             'geo_distance': {
               'distance': '50m',
               'location': {
                 'lat': position.latitude,
                 'lon': position.longitude
               }
             }
           }
         }
       }
     }
   );
 }
Now we have to think about how the collectables will be displayed on our map: we will use Google Map markers. Simply add a "_markers" property to our widget:
Set<Marker> _markers = {};
We then pass this property to our map:
GoogleMap(
           onMapCreated: _onMapCreated,
           initialCameraPosition: _initialPosition,
           markers: _markers,
           myLocationEnabled: true,
           mapType: MapType.terrain,
           rotateGesturesEnabled: false,
           scrollGesturesEnabled: false,
           tiltGesturesEnabled: false,
           zoomGesturesEnabled: false
         ),
Once the markers are in place, we can easily create a method that will allow us to define the markers displayed on the map. A new method is created that takes the results of the previously created "_searchEntities" method as parameters and converts them into markers on the map:
_updateMarkers(results) {
   setState(() {
     _markers.clear();

     for (var collectable in results.hits) {
       final markerId = MarkerId('${collectable['_source']['location']['lat']}#${collectable['_source']['location']['lon']}');

       _markers.add(Marker(
         markerId: markerId,
         position: LatLng(collectable['_source']['location']['lat'], collectable['_source']['location']['lon']),
         icon: entities[collectable['_source']['entity']]['asset'],
         consumeTapEvents: true
       ));
     }
   });
 }
Now that we have all the required methods, our previously created "_synchronize" function can evolve to this:
_synchronize() async {
   Position position = await Geolocator().getCurrentPosition(desiredAccuracy: LocationAccuracy.high);

   this._registerPositionToServer(position);

   _controller.animateCamera(
     CameraUpdate.newLatLng(LatLng(position.latitude, position.longitude)),
   );

   final results = await this._searchEntities(position);
   this._updateMarkers(results);

   sleep(new Duration(seconds: 1));
   this._synchronize();
 }
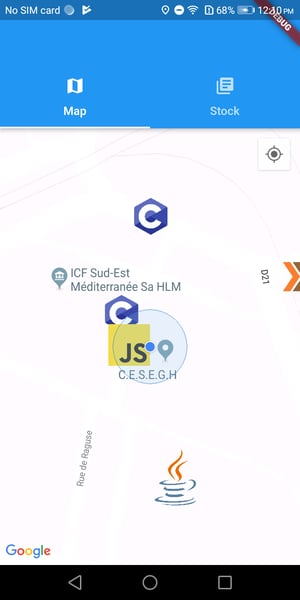
With all this new code, we can now see languages appear on our map:
Let’s catch them all!
Capture of entities
Only a little code remains to be added to make the capture functional. We will make a method that takes a marker ID and a collectable as parameters and removes the marker, removes the collectable from the map, displays an alert and registers in the shared preferences a counter of the number of this entity we have collected:
 _catchEntity(markerId, collectable) {
   return () async {
     final entity = entities[collectable['_source']['entity']];

     showDialog(
       context: context,
       builder: (BuildContext context) {
         return CaughtAlert(entity: entity, count: prefs.getInt(entity['name']) ?? 0);
       },
     );

     setState(() => _markers.removeWhere((marker) => marker.markerId == markerId));
     kuzzle.document.delete('world', 'collectable', collectable['_id']);

     int counter = (prefs.getInt(entity['name']) ?? 0) + 1;
     await prefs.setInt(entity['name'], counter);
   };
 }
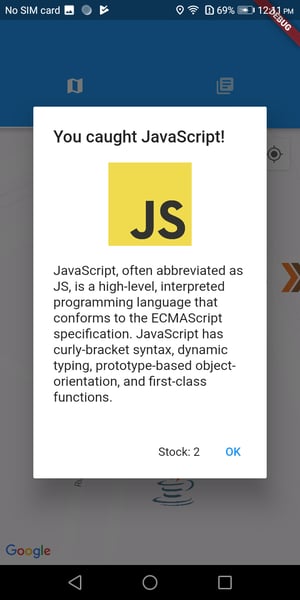
You must also create the alert widget, a simple window that displays the name, image and description of a captured entity:
class CaughtAlert extends StatelessWidget {
 CaughtAlert({ @required this.entity, @required this.count });
 final dynamic entity;
 final int count;

 @override
 Widget build(BuildContext context) {
   return AlertDialog(
     title: Text('You caught ${entity['name']}!'),
     content: Column(
       children: <Widget>[
         Image.network(
           entity['image'],
           width: 100
         ),
         SizedBox(height: 20),
         Text(entity['description']),
       ],
       mainAxisSize: MainAxisSize.min
     ),
     actions: <Widget>[
       Text('Stock: $count'),
       FlatButton(
         child: Text("OK"),
         onPressed: () {
           Navigator.of(context).pop();
         },
       ),
     ],
   );
 }
}
Once all this is done, the last step is to modify our "_updateMarkers" method to add an event handler on the click of the markers to be able to call our previously created "_catchEntity" method:
_updateMarkers(results) {
   setState(() {
     _markers.clear();

     for (var collectable in results.hits) {
       final markerId = MarkerId('${collectable['_source']['location']['lat']}#${collectable['_source']['location']['lon']}');

       _markers.add(Marker(
         markerId: markerId,
         position: LatLng(collectable['_source']['location']['lat'], collectable['_source']['location']['lon']),
         icon: entities[collectable['_source']['entity']]['asset'],
         consumeTapEvents: true,
         onTap: _catchEntity(markerId, collectable)
       ));
     }
   });
 }
You can now click on a language on the map to see what is happening and magic happens:
Before you run outside to collect all the programming languages in the world, why not add a page to view all the entities we have collected?
Listing of collected entities
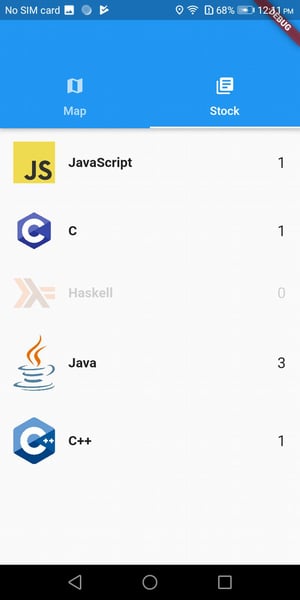
We will simply add a second page to our "DefaultTabController" which will only be used to list the entries recorded in the "shared_preferences". We start by creating our new widget. It is a simple list that takes in props the entities present in the game as well as the player's "shared_preferences". The widget will then search in the preferences for the number of captures for each possible entity of the game:
class CaughtList extends StatelessWidget {
 CaughtList({Key key, @required this.entities, @required this.prefs });
 final dynamic entities;
 final dynamic prefs;

 @override
 Widget build(BuildContext context) {
   final keys = entities.keys.toList();

   return ListView.builder(
     itemCount: keys.length,
     itemBuilder: (BuildContext ctx, int index) {
       final entity = entities[keys[index]];
       return Opacity(
         opacity: (prefs.getInt(entity['name']) ?? 0) > 0 ? 1.0 : 0.2,
         child: Row(
           children: <Widget>[
             Row(
               children: <Widget>[
                 Padding(
                   padding: EdgeInsets.all(16.0),
                   child: Image.network(
                     entity['image'],
                     width: 50
                   )
                 ),
                 SizedBox(height: 20),
                 Text(entity['name'], style: TextStyle(
                   fontWeight: FontWeight.bold,
                   fontSize: 16.0,
                 )),
               ]
             ),
             Padding(
               padding: EdgeInsets.all(16.0),
               child: Text('${prefs.getInt(entity['name']) ?? 0}', style: TextStyle(
                 fontSize: 18.0,
               )),
             )
           ],
           mainAxisAlignment: MainAxisAlignment.spaceBetween
         )
       );
     }
   );
 }
}
All that remains is to add this widget to our "App" widget to create the new page:
DefaultTabController(
       length: 2,
       child: Scaffold(
         appBar: AppBar(
           bottom: TabBar(
             tabs: [
               Tab(text: 'Map', icon: Icon(Icons.map)),
               Tab(text: 'Stock', icon: Icon(Icons.library_books)),
             ],
           ),
         ),
         body: TabBarView(
           children: [
             GoMap(entities: _entities, prefs: _prefs),
             CaughtList(entities: _entities, prefs: _prefs),
           ],
         ),
       ),
     ),
We can now see in our application this superb page which will be a little bit like our language-dex (less sexy than pokedex...).
There you go! You can also try to add some features to the app:
- give a probability of occurrence to each entity
- a way to capture entities without simply clicking on them (why not write a hello world in the language you want to capture?)
- bonus objects (to make more languages appear for example)
The complete code of the application is available here.
Happy hunting ;)

